Satellite
Satellite layers create meshes which are textured with maps from a tile provider such as Bing, Mapbox or Mapquest. In addition to that a satellite layer can be enhanced with terrain heights. These heights are provided by NASA and the NOAA. At the moment only global data sources are used for heights.
A satellite layer is a great starting point when creating any map. You can map large and small areas quickly by adjusting the zoomlevel. There are many map styles you can use.
Examples
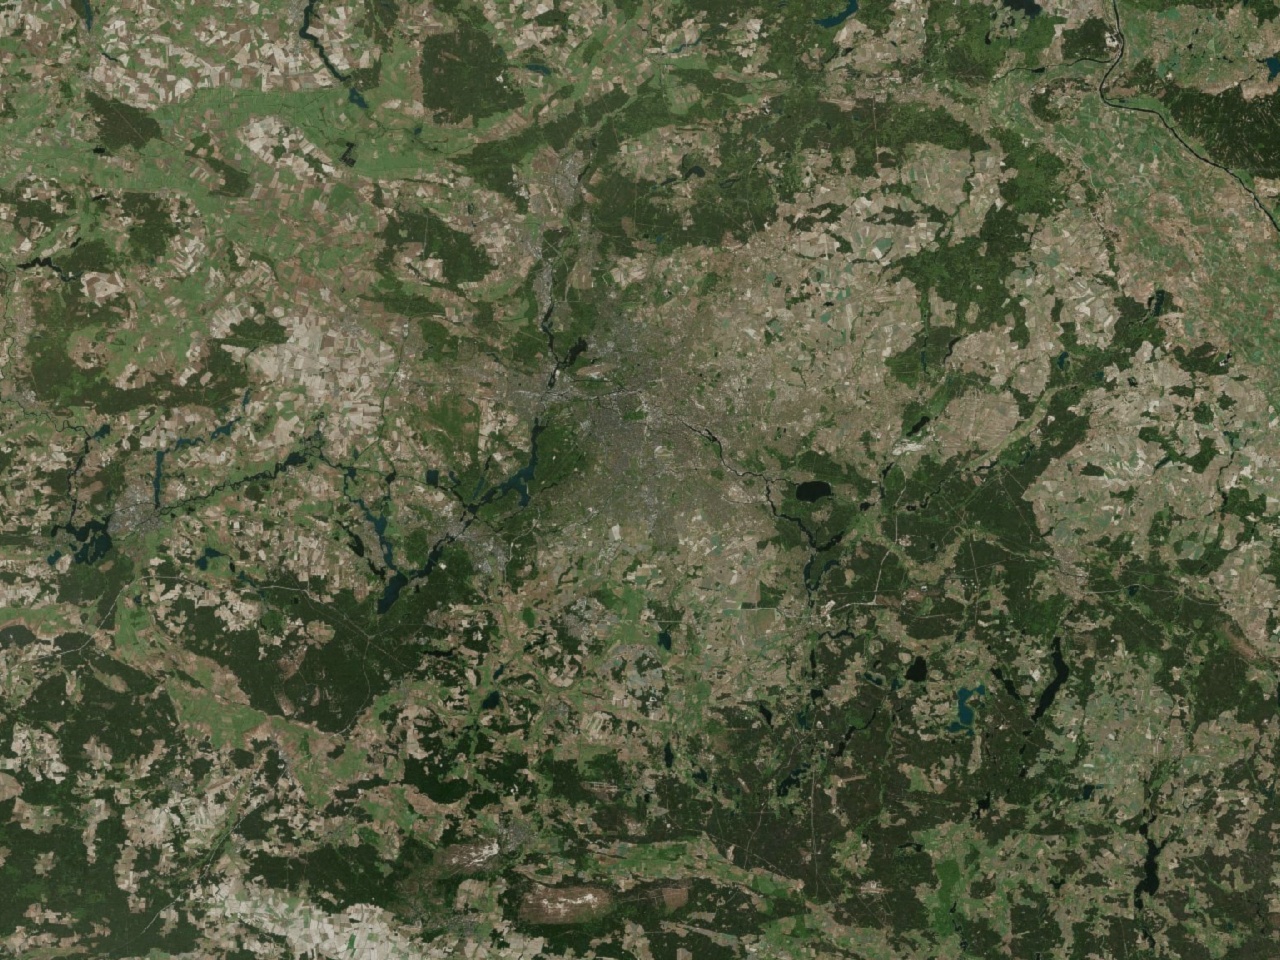
Berlin and its surroundings with Bing
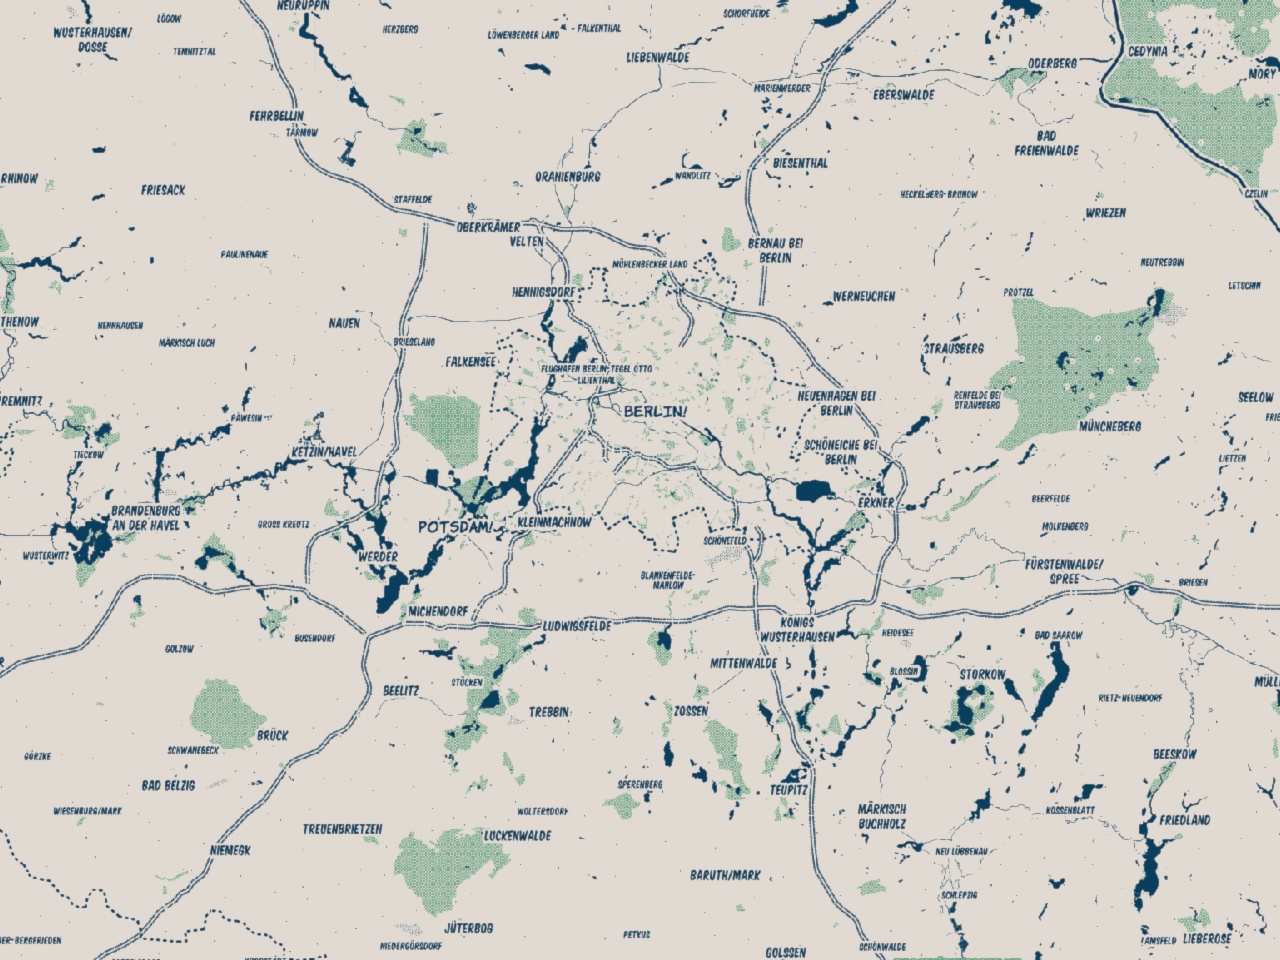
Berlin and its surroundings with Mapboc Comic
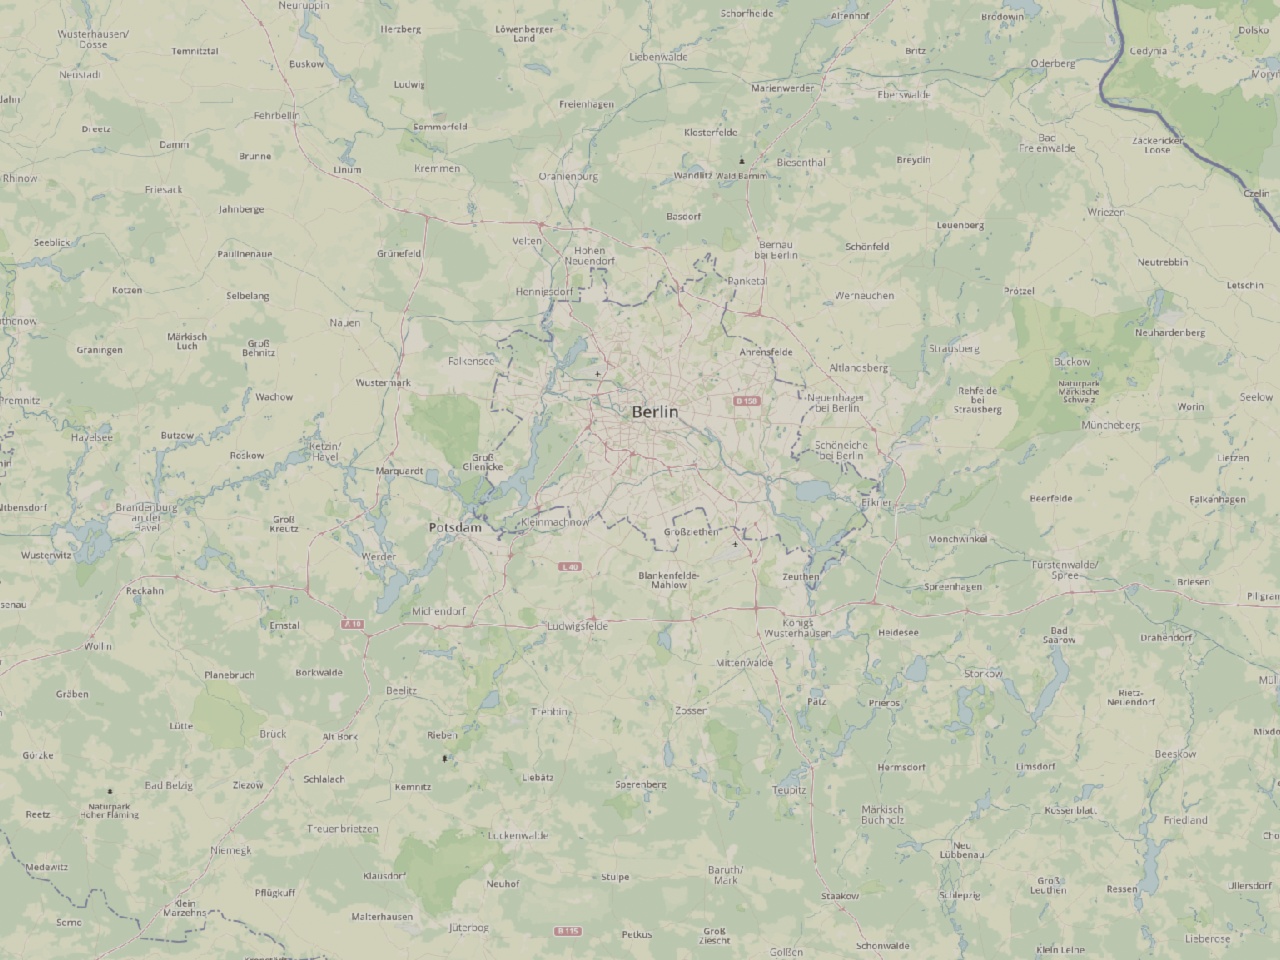
Berlin and its surroundings with Mapbox outdoors
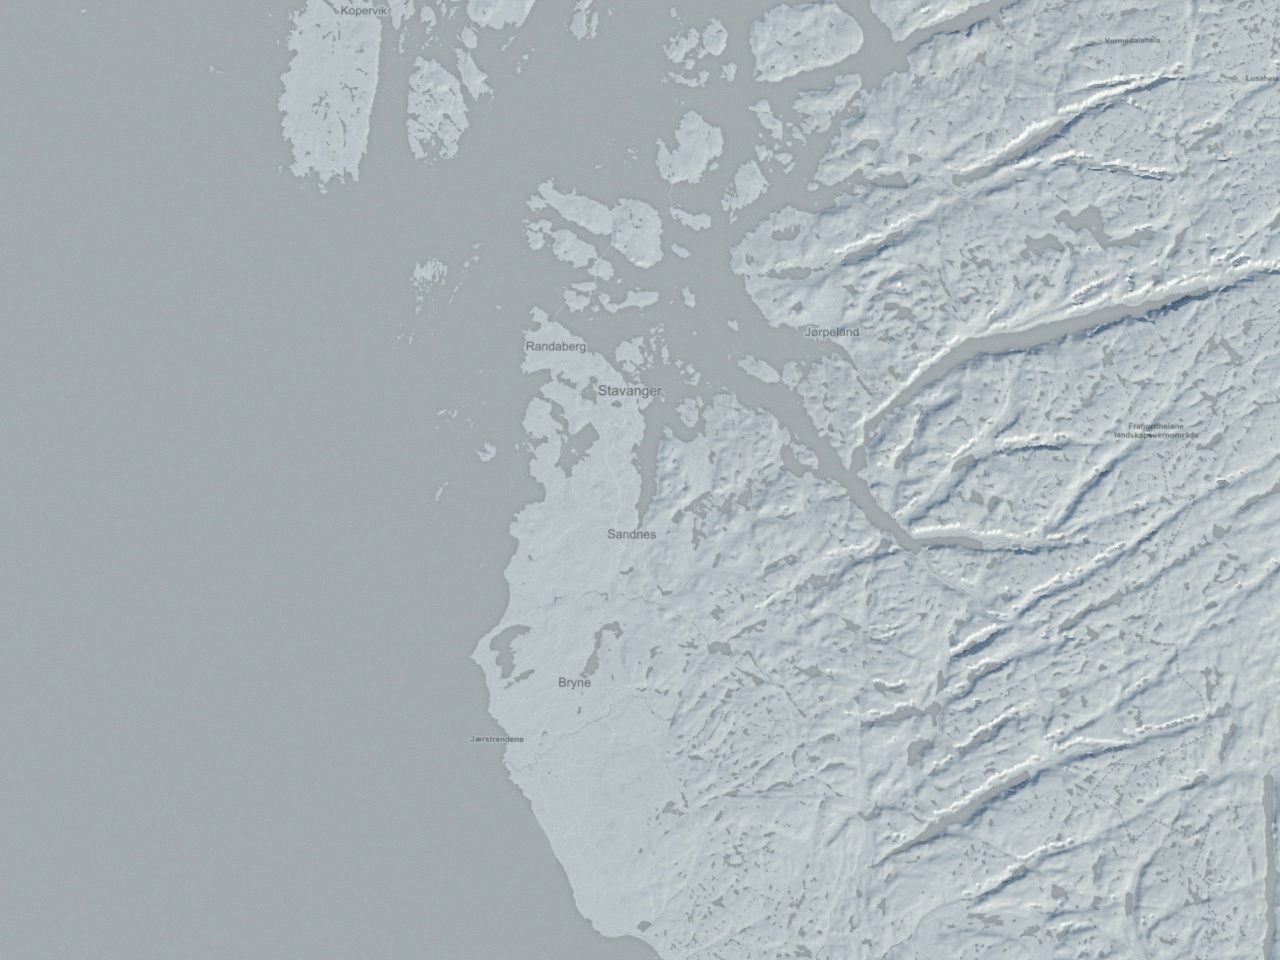
Stavanger, Norway, and it’s surrounding fjords. Mapbox light texture and SRTM3 height data.
Interface
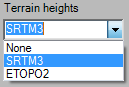
The satellite layer has three options: Image source, Zoom and Terrain heights.
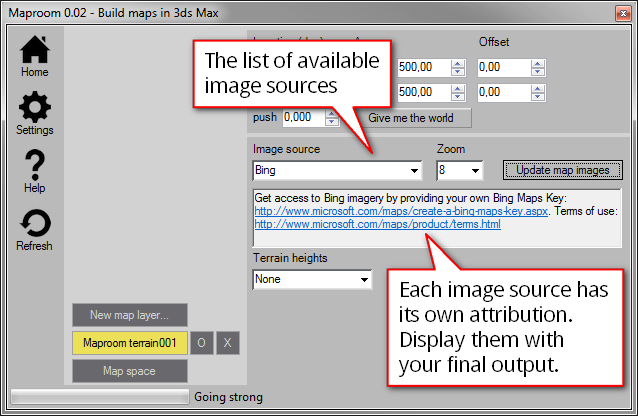
An overview of a satellite map layer
Image source
With the image source you specify which texture you want for the map, e.g. Bing, Mapbox, Mapquest. Each image provider issues an attribution text with links to the source. These have to be displayed in the products you make, be it images, animations or something else.
Note
Content provided through the Maproom script is copyrighted by the respective owner. Check out the copyright, license and attribution conditions for each of these sources. The creator of this script does not claim ownership and can’t provide a license for this content.
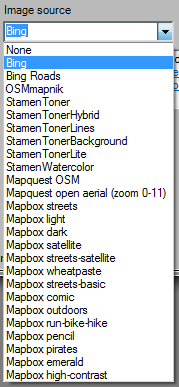
A list of available map layers
Zoom
The zoom determines the zoomlevel you’re downloading. A higher zoomlevel means sharper images but at the same time you’ll need more images to cover the same area. Maproom protects you from picking zoomlevels which are too high and which would result in too many downloads.

Most image sources have zoomlevels between 1 and 21
We’re all very used to zooming in and out of an online map. If you want more detail you just zoom in and if you want to get a bigger picture you zoom out. Each time you zoom, the map is rendered to show different things. When looking at a map at world scale, you don’t see individual cities, when looking at an entire city you won’t see individual buildings. You don’t really have to think about this, it’s intuitive.
When building a static map in 3ds Max you have to design the map with a certain zoomlevel in mind. If you make a global map, you can pick a low zoomlevel such as 3 or 4. If you build a map of a few streets you’ll need more detail and a higher zoomlevel such as 17 or 18. the higher the zoomlevel, the sharper the map will be and the more images need to be downloaded. Each account is setup with a download cap to avoid zoomlevel mistakes. Setting the “wrong” zoomlevel might tell Maproom to download thousands of images. Increasing the zoomlevel by one step multiplies the images needed by four. This means Maproom isn’t able to build a world map with street level detail!
Raster sources are confined to a zoomrange. Normally this is 1 to 21. 1 is world scale and 21 is street level. There are raster sources with other zoomranges, such as Mapquest open Aerial which runs from 1 to 11
Some sources don’t have a zoomlevel, such as the height data. These just come as a static dataset with a fixed resolution. The height data included in Maproom is on global scale. SRTM3 has an approximate resolution of 90m per pixel. ETOPO5 is even coarser.
Estimate zoom
Getting the right zoomlevel takes a bit of practice. And while Maproom protects you against picking a technically inappropriate zoomlevel, this doesn’t help you much picking a good-looking zoomlevel. You can use the `Estimate zoomlevel` feature to do just that. Let’s illustrate this with an example.

Set the estimated width of the map in pixels and press the button to get a zoomlevel estimate.
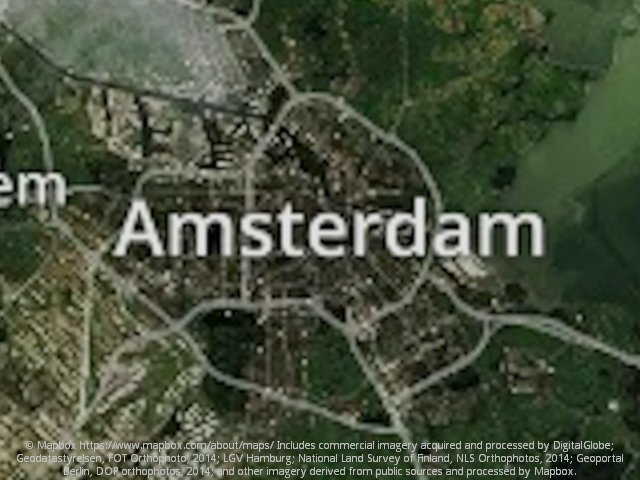
Let’s assume I’m making a still render of a map of Amsterdam. I’m using a satellite map with street labels, such as Mapbox streets-satellite. Since I’m using these labels, I want to be able to read them. I also want to see enough detail in the satellite image. This means I need to pick the proper zoomlevel. I base the zoomlevel on two factors: how big is my rendered map going to be (in pixels) and how big is the actual map (in meters). If my render is going to be 250 pixels wide I can get away with little detail in my map (lower zoomlevel). If my render is going to be 4K pixels wide I need a lot more detail (higher zoomlevel). If my map covers a few streets, I need to be able to see those streets up close and use a high zoomlevel. If my map covers an entire continent, I won’t bother with streets and I can use a much lower zoomlevel with less detail showing countries and large water bodies.
The `Estimate zoomlevel` feature takes this into account and suggestes the appropriate zoomlevel for your map size both in km and px. In my example I’m using a still image. If you are rendering an animation or output to a realtime engine you need to take that into account.
Here’s what I mean with appropriate zoomlevel. My map is about 50*50 KM and I’ve set the width to 640 pixels. These images aren’t blowups from a single image, they’re actual separately generated maps and different zoomlevels. Each image is rendered at 640 pixels wide.
Amsterdam at zoomlevel 9. This is too rough, the label is very blurry as are the streets.
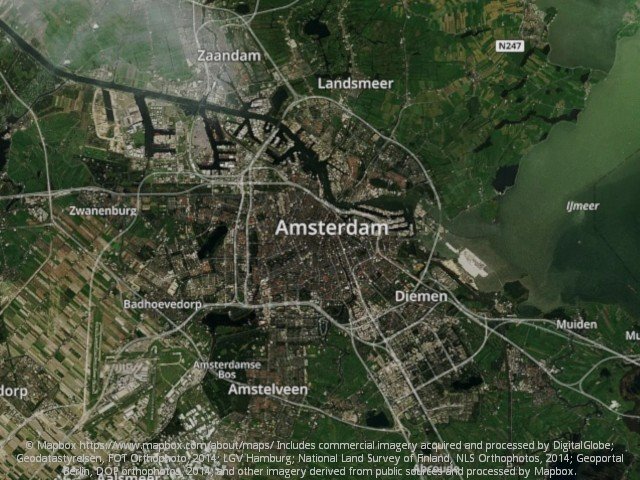
Amsterdam at zoomlevel 11. This is the suggested zoomlevel. The amount of detail in the image and labels is just right.
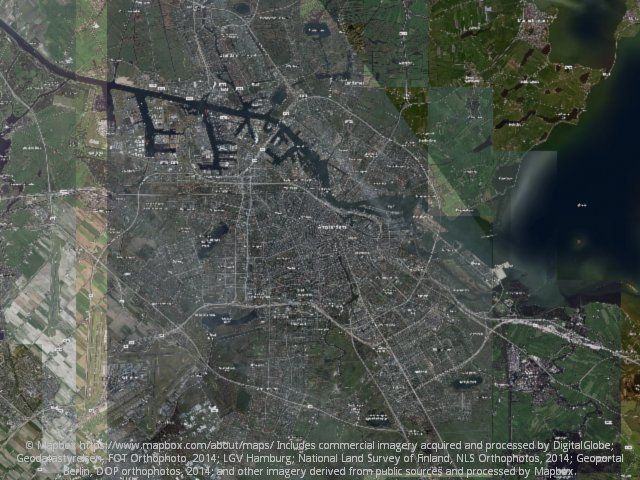
Amsterdam at zoomlevel 13. There’s more detail, but I can’t read the labels. Also the extra detail in the satellite image doesn’t help.
Copyright
Each raster source comes with a copyright notice and an attribution string. It’s important to remember Maproom doesn’t own, sell or license the map data. You’ll have to make sure to include the attribution in your final output.
Note
Content provided through Maproom is copyrighted by the respective owner. Check out the copyright, license and attribution conditions for each of these sources. The creator of this script does not claim ownership and can’t provide a license for this content.
API keys
Some map providers, such as Bing and Mapbox require an API key before supplying their data. To get a key, you make an account with these map providers. Normally you can make a free account. The key is used by these providers to track your usage. Don’t worry too much about this. The limits are set pretty high and relate to dynamic slippy maps served online. Building static maps in 3ds Max won’t consume a lot of map data.
You can enter your API keys in the settings panel.
Procedures
Using a raster source in a map
Open a terrain map layer
Pick a raster source from the list
Pick a zoom level
Press the “Update map images” button
Maproom will request the necessary images from the raster source and assemble them into a map.
Note
Maproom limits the amount of images it will download per map layer. This limit depends on the license you own. More about licensing here: License.
Adding heights to a map
Open a terrain map layer
Pick a DEM source
Press the “Update map heights” button
Maproom will request the necessary DEM data and assemble them into a map. You can add heights to a terrain with or without raster tiles.